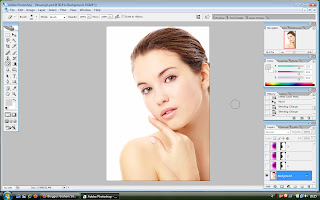
I'm going to try and combine the two, to simulate some photographs I've seen on Rankin's website: http://rankin.co.uk/beauty/#/pic84 He probably has a much more complicated system for producing his images, but I'm just trying to illustrate what you can do with layers (not produce fine art!)
You'll notice from the screenshots, that I''ve already produced the picture and I'm working my way backwards. I thought that would be the easiest way. I'm also trying to minimise the number of screen shots, to keep the post length down. OK, lets start.
Then open the image of the flower.
Copy and paste the flower picture on to the first picture, this will automatically create a new layer which you can manipulate. Click the show transform tools check box, then rotate the picture 90 degrees and increase the scale, so that it covers the whole girl. Now go to the blending mode selection drop box and switch the blending mode to overlay:
This gives you a very basic picture, with the flower texture overlayed on the top, not bad, but it can still be improved. Go to layer-layer mask-reveal all. In the layers window, you'll now have a small white box next to the picture of the flower. Select a paintbrush (making sure it's set to black), open the paintbrush sub menu at the top of the screen and reduce the hardness down quite low (this means the brush won't create such harsh edges when you paint.) Making sure the layer mask box is selected use the brush to cover any areas you want to show through the texture layer, such as the eyes and teeth.
Again the picture doesn't look too bad, but I wanted a more dramatic effect. So dragging the flower layer down to the create new layer button twice, I created two copies of the layer (it automatically copies any layer masks and blending modes.) As both of the new layers, were also set to overlay, this creates a more dynamic picture. Unfortunately, it was a little too dynamic and I'd lost some of the detail, so, for the top most layer, I adjusted the master opacity down to 80%.
Finally I flattened the image, and here you have it:
I think it turned out quite well in the end, but then again I'm using much better photos, so that probably helps! I really like the way her eyes have become the main focus of the picture. I did think about changing my main theme to this style of picture, but I think Marie would kill me, so I'd better not.


I think this turned out lovely....like it was meant to be that way. I will have to learn to copy and paste.
ReplyDeleteI loved this image so much I gave it a go myself. I found though on my go using paint brush on the eyes made them go very dark almost black when I copied the layers. I used the eraser tool instead and it came up with the same effect. Maybe its the version of Photoshop I was using. Thank you for sharing this idea is fab!
ReplyDeleteThanks you two!
ReplyDeleteI think you're being overly generous Ness, but thanks anyway;)
No problem Rachael. The eraser's probably a better way anyway. I just do things the way I think's best at the time.
See you wednesday:)